|
By Gemma ~@Juicygamereviews
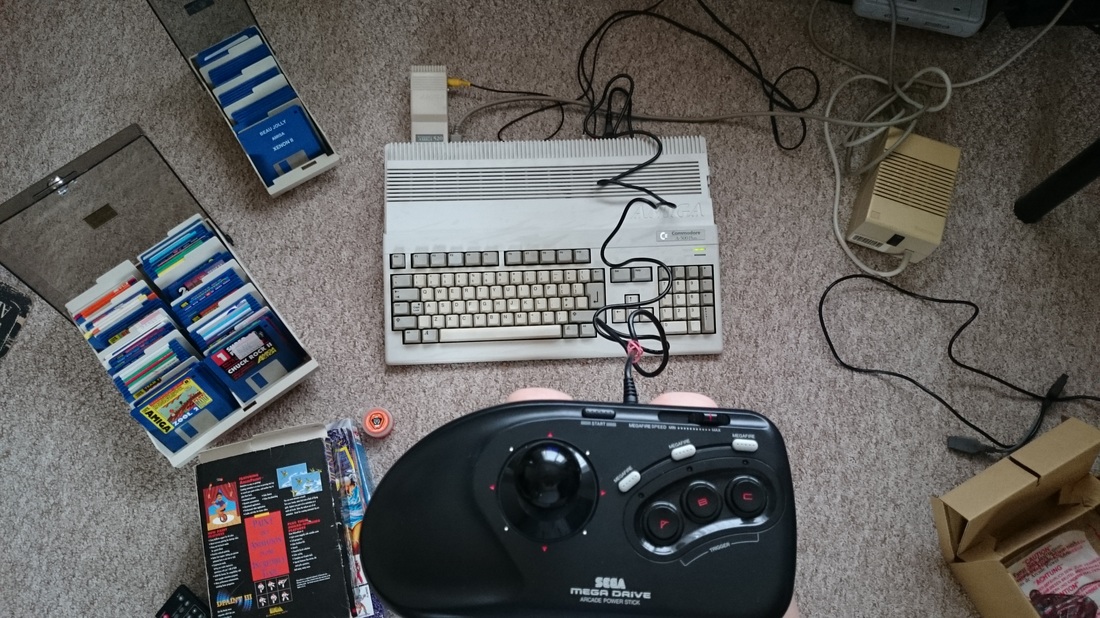
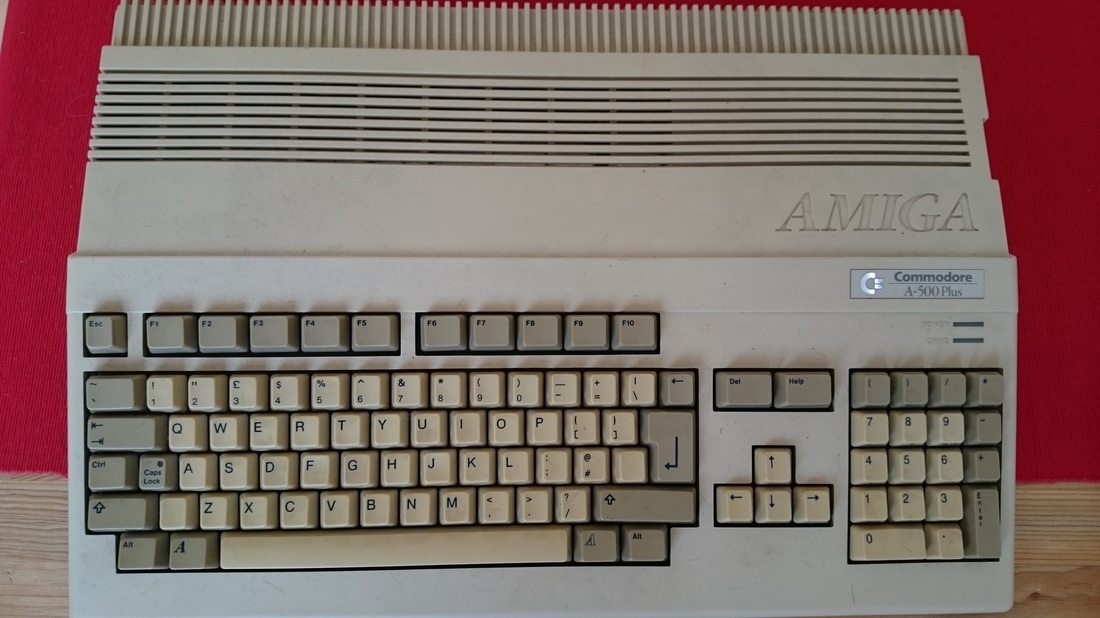
My newly restored Amiga 500+ setup. Look at how yellow the power box is compared to the Amiga (after treatment)
It's been a long problem for us gamers that causes a lot of upset when buying video game consoles. I'm talking about consoles yellowing. That filthy, mustard looking appearance of the shells of the Super Nintendo, Amiga and many more. The horrendous colour change is caused by too much exposure to UV light which conflicts with the chemical, Bromine (makes the plastic fire retardant) thus causing the yellowing.
There are numerous ways to reverse or lessen the chemical reaction, therefore, restoring the plastic cases back towards their original colour. I recently did this with my Amiga 500+. I purchased it and got a pretty good deal but the downside was the plastic case, keys, mouse and power box were a solid eight out of ten on the severity scale for yellowing. I'm going to tell you my procedure which worked wonders for me...
I stripped the top Amiga case off and popped every key off afterwards. Fortunately I didn't need to treat the underside as the plastic had not yellowed. I used 12% Hydrogen Peroxide cream as my sole treatment for this de-yellowing process. I'd highly recommend this but please be careful as it burns your skin if it comes in to contact. I wore gloves to be safe.
I coated the top case in the Hydrogen Peroxide cream using a small paint brush. I applied a decent amount ensuring every ounce of the case was covered. Once fully coated I wrapped the Amiga case in cling film (saran wrap) and left it in the sun (you can also use a UV lamp) for thirty six hours. You must use cling film to avoid the Hydrogen Peroxide evaporating. Repeat the same procedure with the Amiga keys. When disamsembling the Amiga keyboard make sure you collect the springs underneath the keys as they are very delicate. I washed all of the springs in warm soapy water. 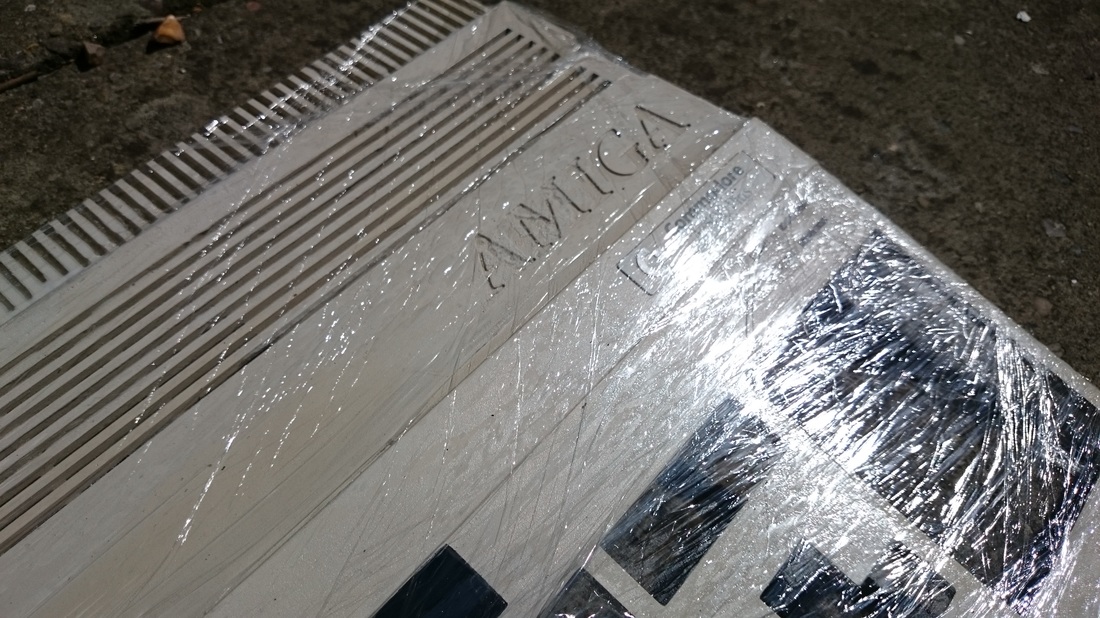
The Amiga 500+ top case after one application of Hydrogen Peroxide
I repeated the whole procedure the day after but rather than apply a second coat over the first, I washed the keys and case down in warm soapy water before starting again.
After thirty six hours I washed the Amiga 500+ and keys and started to reassemble. The results are unbelievable! Whereas the Amiga was an eight out of ten for yellowing prior to the treatment; after the treatment I'd say it's a two out of ten now. My next project will be to de-yellow my Super Famicom! 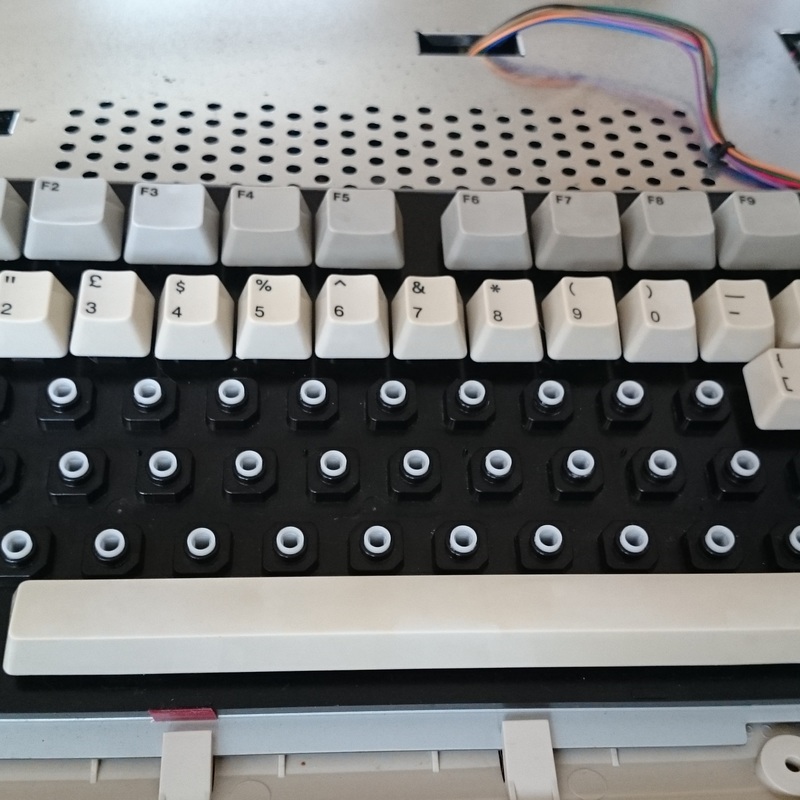
Amiga 500+ Look at the difference in the keys
If you have any questions about this then please leave a comment. Check out my other consoles on the Video Game Collection page. I'll be doing a full pick ups video for the Amiga bundle on my Youtube channel very soon. For now, check out more pictures of the procedure in the slideshow below as well as my epic Amiga 500 Bundle pick ups.

15 Comments
Luis
11/7/2015 13:37:48
Awesome tutorial!
Juicy Game Reviews
11/7/2015 13:39:06
Thanks Luis. Do you have any yellowed consoles you'd treat?
Keith
18/7/2015 05:02:26
Good tut Gebs, I felt myself reel from the screen when I saw that much under the keyboard. TBH I've seen worse but, you did a great job restoring a great machine to its former glory. Well done!
Juicy Game Reviews
18/7/2015 08:23:04
Thanks Keith. Very kind words. I really enjoyed the project. My Famicom is next :D 24/7/2015 15:27:44
I have virtually the same creme peroxide my hairdresser picked it up for me for a fiver ;)
Juicy Game Reviews
29/7/2015 13:42:30
YAY to the hairdressers :)
Juicy Game Reviews
17/8/2015 03:35:21
Let me know how you get on Steve.
Johan W
11/10/2015 12:23:09
I have a very yellow A500 that I want to try to look as new but I think I need to wait when it is more sunny as I live in Sweden.
Juicy Game Reviews
26/10/2015 12:45:54
Hi Johan. I coated each key individually then lay them on cling film. I had to be careful to lay another piece of cling film across the top before moving the keys outside in to the sun :)
John L
26/10/2015 11:17:29
So you say you applied it again. So two 36 hour sessions in the sun? How did you make sure all sides were exposed to the UV light? Did you find a particular angle works best to get all the sides evenly exposed? Thanks.
Juicy Game Reviews
26/10/2015 12:44:23
The total time was 36 outside in the sun and in that time I applied two coats. I had to continue to move the shell around in order to ctach the sun so no particular angle worked best. The cling film maintains the coatings so the contained heat works pretty well evern if its not in direct sunlight. Thanks, Gemma.
Paul
1/12/2015 13:34:43
Hi...
Juicy Game Reviews
1/12/2015 16:43:12
Hi Paul,
Standa
3/12/2019 13:42:57
Hello. Leave a Reply. |
Retro Game Reviews. Mega Drive, Super Nintendo, Sega Dreamcast and moreCategories:
All
Latest YouTube Videos:Video Game Stores:
Retro Mania
Check out Warners Retro Corner

Check out Crazy Thumbs, London

Super Game Shack
Game Smart Yardley
|

 RSS Feed